User documentation
Everything Kino and Kino Scribe can do, screen by screen, in plain words. Use the switch below to read the phone version or the desktop version.
New here? The quick tutorial is a shorter place to start.
Jump to section
Getting started
Kino turns a written idea into a short AI video, five to fifteen seconds long, complete with sound. You describe what you want to see, add a photo if you want, and Kino generates the picture and the audio to match. It works the same way on your phone and on a computer, with one account and one balance of credits shared between them. Use the switch above to read about the one you are using.
Everything starts on the Create screen: pick one of the three ways to make a video (see below), write what happens, and press Generate video. New accounts start with 50 free credits automatically, enough to try it right away. Nothing is ever charged for a video that fails.
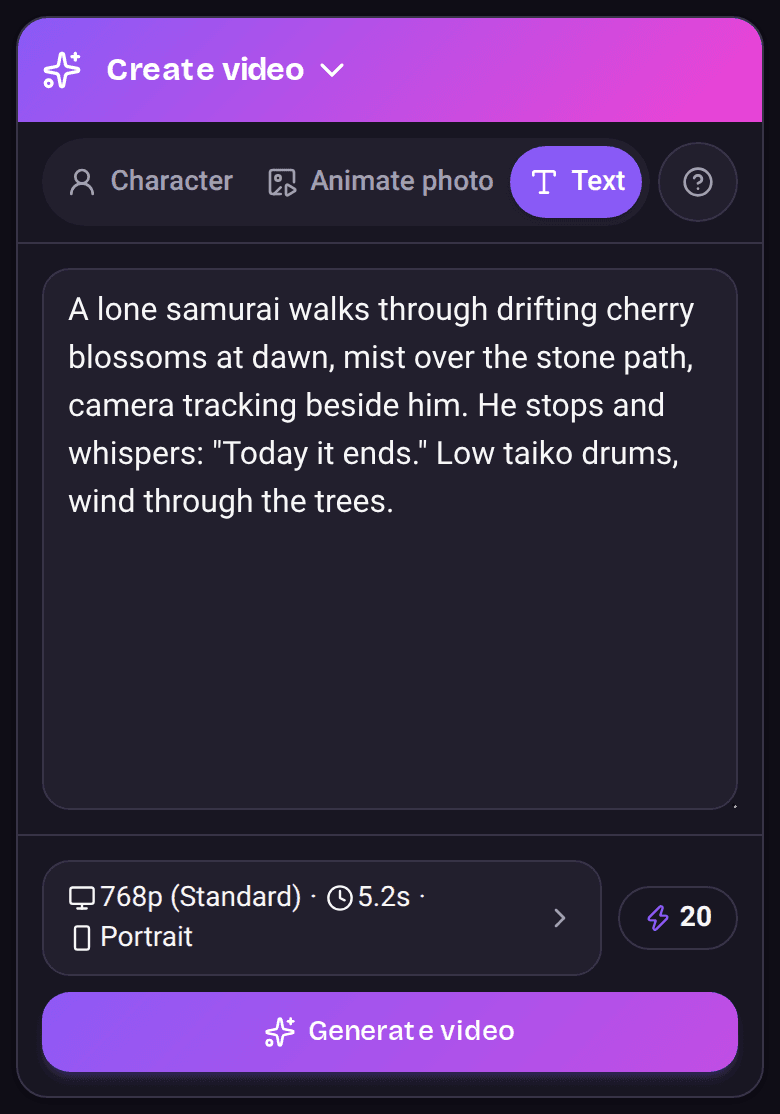
The mode chooser is at the top of Create, the photos under it, and the text box below them. At the bottom, one row shows the current settings and the credit cost, right above Generate video.
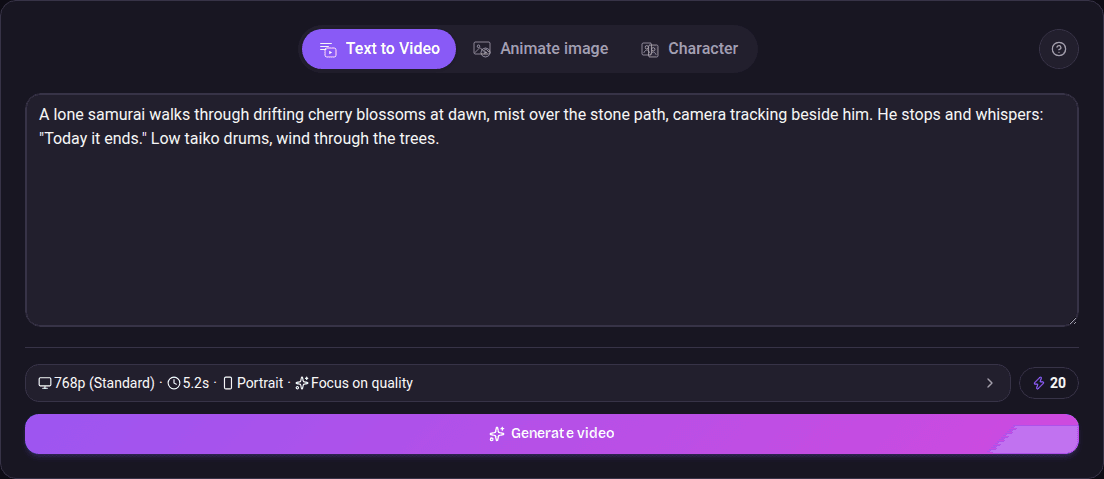
The home page is the Create card with a wall of sample videos under it. Your own videos are on the My media page in the sidebar on the left, your credit balance is in the top bar, and the circle in the top right opens your account.
Prefer a short walkthrough with pictures? Read the tutorial. In the app, the ? button next to the mode chooser explains the mode you are on and shows an example.
The three ways to make a video
The mode chooser at the top of Create has three options. They decide what Kino does with a photo, so pick the one that matches what you want. Kino remembers the mode you used last.
Character
Turns the person in your photo into a character and puts them in any story you write. Kino uses the photo only to know what they look like. The place, the action and the words all come from your text, so describe a whole new situation: a beach, a kitchen, a stage, anywhere.
- Add your photo, then write what happens, as if telling a friend
- The photo says who the person is, not where they are. Invent the place and the moment
- Want them to talk? Write the line in quotes: "Come here!"
- Faces look best up close, so ask for a close-up when they speak
Animate image
Makes your photo move. The video starts exactly like the photo and then things happen: people move, the camera moves, sounds play.
- The first moment of the video is your photo, as it is
- Write what happens next and how the camera moves, for example: she turns and laughs, the camera comes closer
- Do not describe the photo again. Kino can already see it
- To make someone speak, write the words in quotes
Text to Video
Makes a video from your words alone. No photo needed. Describe who is there, where they are and what they do.
- Say who, where and what happens, in plain words
- Add how the camera moves, if you want: comes closer, follows, turns
- Write spoken words in quotes
- Concrete details give better results: time of day, clothes, mood
In short: Character keeps the person and changes everything else, Animate image keeps the whole picture and adds motion, and Text to Video needs no photo at all.
Describing what happens
The text box is where you tell Kino what to make. Write it the way you would describe a moment to a friend: who is there, where they are, what they do, and what you hear. One or two clear sentences work better than a long list. A few habits make a big difference:
- One moment, one continuous camera move. Asking for cuts, a new angle, or a change of place mid-video usually looks jarring. Say what the camera does instead: comes closer, pulls back, follows, turns.
- Spoken words go in quotes. Write She smiles and says: “Come here!” and the person will say it, with a voice to match. Kino speaks the language you write in.
- Faces look best up close. When someone talks, ask for a close-up. Faces get soft in wide shots.
- Direct the sound too. Say what you hear: a quiet room, street noise, soft piano, a full score. Kino generates the audio from your words as well.
- Say what you want, not what you do not want. The one exception is on-screen text: if you do not want captions or subtitles in the picture, say so.
The Explore tab has ready-made examples you can copy and change: tap one and its description loads into your text box.The sample wall under the Create card has ready-made examples: click a sample and its description loads into your text box, ready to change. More tips and camera moves are in the tutorial.
Photos and references
What a photo does depends on the mode you are in.
Character
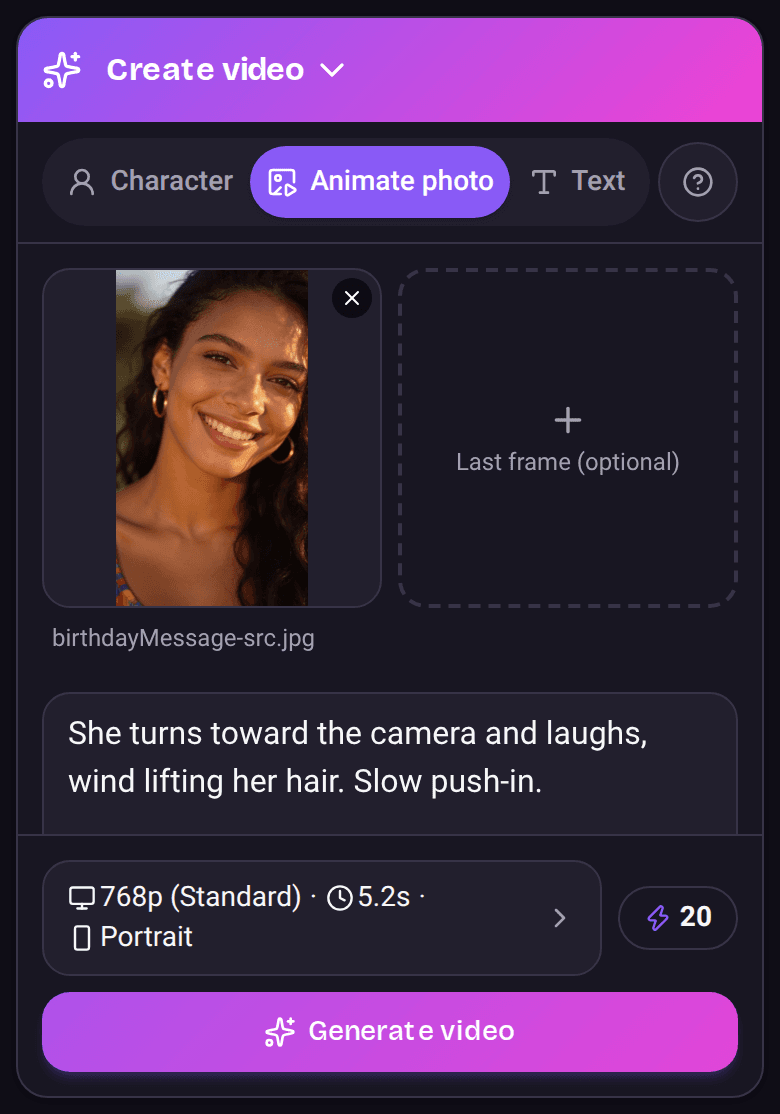
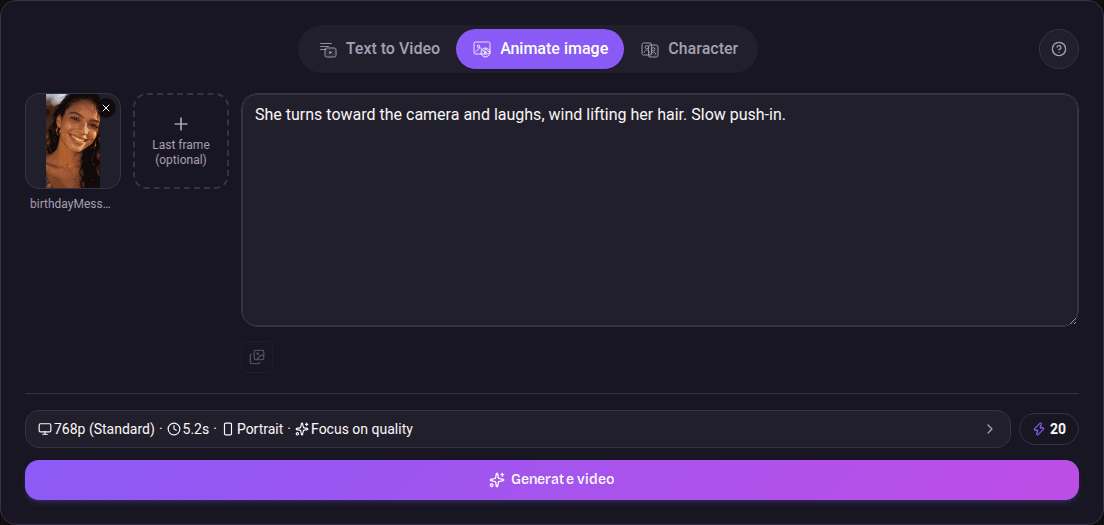
Add one or more photos of the people you want in the video. Each photo tells Kino what one person looks like, and only that: the place, the clothes, the light and the action all come from your text. When you write, press : (a colon) to pick which person you mean; they appear in your text as a small chip. A clear, well-lit photo of the face works best. The photo card above the text box holds your people, and + adds another from your phone.The photo deck on the left of the text box holds your people; hover it to see them all, and the counter shows how many more fit.
Animate image
Add the photo that becomes the very first moment of the video (First frame). Do not describe the photo again; Kino can already see it. Write what happens next. You can also add a Last frame, which is optional: Kino then moves from the first picture to the last one.
No photo? Make one
Every photo slot offers Generate with AI: describe the person or picture you want and Kino creates an image you can use straight away, either as a character or as a first frame. See Creating images.
Duration, format and quality
Just above Generate video there is a row showing the settings your video will use right now. Tap itClick it to open Settings and change any of the three. The credit cost updates the moment you change one.
- Duration: how long the video is, between five and fifteen seconds. Longer costs more.
- Video format: portrait for phones and stories, landscape for screens. Pick this before you generate; a finished video cannot be rotated.
- Quality: Focus on quality (best quality, slower) or Focus on speed (quicker and cheaper). Use speed to test an idea, quality for the version you keep.
Every video renders at the same fast resolution. Once a video is done, you can generate a sharper 2K or 4K version of it from that video's own menu.
Generating and credits
Everything is priced in credits; dollars only ever appear at checkout. The exact cost of the video you set up is shown next to Generate video before you press it. As a live anchor, for the shortest video (5.2s) at Focus on quality costs 20 credits, at Focus on speed costs 13 credits. These move if pricing is retuned; always trust the number on the button over anything written here.
What happens after you press Generate video
- The cost is reserved, not charged. You only pay when the video succeeds. A failed video costs nothing and the reservation is released.
- The video appears in My media at once, with its progress. Kino takes you there as soon as you press the button. First it may say Waiting for a free GPU… or Initializing GPUs… while a machine is being prepared; then the progress bar moves.
- You can make two videos at the same time. Press Generate video for a third and Kino asks you to wait for one to finish; nothing is charged.
- If one of our machines drops out mid-way, Kino retries for free and tells you so on the card.
- When Kino is at full capacity it pauses new videos for a few minutes and says so. Nothing is charged; just try again shortly.
Stopping a video
A video that is still generating can be stopped with Abort this render. Because the computing time already spent is real, stopping charges only the part that was done, never more than the price you saw, and nothing at all if it had not really started. The confirmation shows both numbers before you decide. This is different from a video that fails, which always costs nothing.
My media
Every video and image you make lands in My media, newest first: the My media tab in the bar at the bottom.: the My media page in the sidebar on the left. Videos still generating show their progress there; finished ones play in place.
Open any finished video to:
- Generate again: run the same idea again. Every generation is a little different, so this is the normal way to get a better version.
- Open: load that video's text, photos and settings back into Create, so you can change one thing and generate a new version. The original stays as it is.
- Share and Download: send the video to another app or save it to your phone.copy a link or save the file to your computer. Downloads are good-quality MP4, one format, no choices to make.
- Delete: remove the video. This frees the storage it used.
Subtitles
A finished video also offers Add Subtitles with Kino AI: Kino listens to the video, writes the subtitles and times them for you. You choose the style (Film for plain lines or Highlight, where each word lights up as it is said), the position, the size and the background. The price in credits is on the button before you apply. For longer videos and full control, use Kino Scribe.
To add subtitles to a video, download it and open it in Kino Scribe, Kino's subtitle tool.
Creating images
Kino also makes still images. On Create, tap the Create video title at the top and choose Create image.Switch to Create image above the Create card. Describe the picture, choose Image format (Portrait, Landscape or Square) and the image model, and press Generate image. Images cost credits too, shown next to the button, and a failed image costs nothing.
A finished image can go straight into a video: Create a character puts the person from the image into Character mode, and Animate this image uses it as the first frame in Animate image mode. This is the easiest way to make a video of someone who does not exist.
Kino Scribe
Kino Scribe is Kino's subtitle tool for videos you already have (same account, same credits). Open it from the card on the home page. It is built for a computer screen; open getkino.io on a desktop to use it. It takes a video from your device and gives you back the same video with subtitles burned in, or a subtitle file:
Import
New video uploads a video file and opens the editor: just your video, nothing to configure.
Transcribe
Add Subtitles with Kino AI listens to the video, detects the spoken language and writes timed subtitles, priced per minute of audio and shown in credits on the button before you run it.
Edit
The list under the video lets you fix, retime, split, merge or delete any line, and you can drag the caption box on the preview to move or resize it.
Styles
Film (plain lines) or Highlight, the social-media look where each spoken word lights up as it is said. Text color, highlight color, size, spacing, wrapping and an optional background box are all adjustable.
Export
- Export: a good-quality MP4 with the subtitles burned into the video, priced per minute of video and shown in credits.
- Export subtitles: a plain subtitle file (SRT, VTT or ASS) for a small per-minute price, to use in any other editor.
Billing & credits
Everything in Kino is priced and shown in credits. Dollars only ever appear at checkout. Purchased credits never expire. See Generating and creditsfor how a video's price is built.
Buy credits from the Subscribe tab in the bar at the bottom:from your account menu in the top right, on the Credits tab of Settings: each pack shows the credits it buys, with the price underneath. Checkout runs through Stripe; from Brazil you pay in reais, everywhere else in US dollars. We never see or store your card number.
Subscriptions (Basic $12.00/mo, Premium $35.00/mo) deposit credits into your balance every month. Basic deposits 320 credits/month (about 16 videos in 768p at Focus on quality); Premium deposits 940 credits/month (about 47). Plan credits reset to the plan amount at each renewal (no rollover); purchased credits never expire and are spent only after your plan credits run out. Current prices are on the Plans page.
Every priced action follows the same rule: charge on success only. The price you see before you press is a reservation; a failed video, image, transcription or export charges nothing and the reservation is released. The one exception is a video you stop yourself, which settles only the part already done (see Stopping a video).
Full terms, refund conditions and how we handle your data are in the Terms of Service, Refund Policy and Privacy Policy.
Your account
Your Profile tab, the last one in the bar at the bottom,Your account menu, the circle with your initial in the top right, holds your account, your credit balance and a history of every credit that came in or went out. You can switch the app's language between English and Portuguese there at any time.
Delete account is in the account section. It permanently deletes everything of yours: every project, video, image and uploaded file, your prompts and settings, and your name, email, password and connected logins. Any active subscription is cancelled right away. We keep nothing that identifies you afterwards; only payment records stay with our payment provider, without your name or email, because tax law requires it. You confirm by typing your email address, and it cannot be undone.
Getting help
- In the app: the ? next to the mode chooser explains the mode you are on, and Help in your profile explains every screen.
- Email support: support@getkino.io for anything, including a video that came out wrong or a billing question. Tell us which video and we will look at it.
- Policies: Terms of Service, Privacy Policy, Refund Policy.
Questions this page does not answer? support@getkino.io.